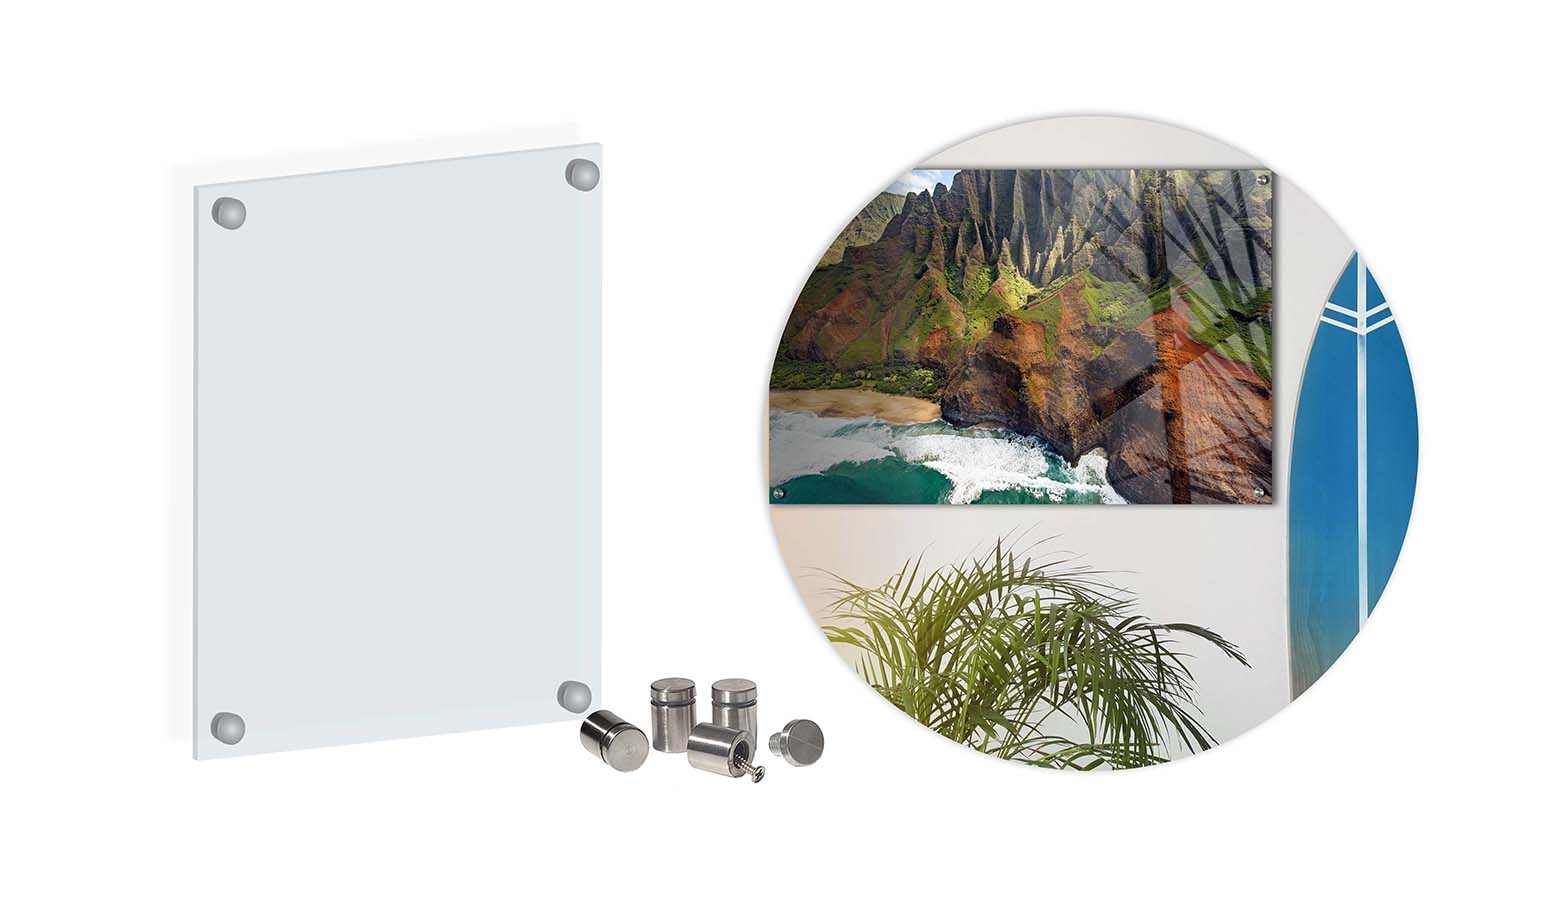
How to Hang Translucent Acrylic Art With Standoffs
Hanging Your Acrylic Print with Standoffs
Standoff bolts, are easy to install and add a modern feel to your acrylic print. This type of method allows the print to appear like it is floating off of the wall. Standoffs are great for any size photograph and can withstand weight for large prints or heavier pieces of art. Depending on your print size and location, you may need assistance during this process.
-
Step 1 - Position the print in the desired location
Begin by deciding where to mount the print and ask for assistance if the print is large. Ensure the print is level before you begin the hanging process.
-
Step 2 - Mark the pre-drilled holes
Our Acrylic Prints are pre-drilled for easy mounting. Mark the pre-drilled holes using a pencil by tracing the circle shape to identify where you need to place the mounting bar anchors. Once this is done, you should have four clear marks on the wall. After this step, the print can be placed back on the floor.
-
Step 3 - Screw the anchors into the wall
Take your power tool and drill the anchors into each circle marker you traced in Step 2. The anchors must be flush to the wall to ensure proper installation. Due to the size and weight of Acrylic Prints, anchors help to ensure the print doesn't pull out from the wall and is securely fastened.
-
Step 4 - Separate the standoff cover and bolt
Take the standoff bolt and remove the cover plate by unscrewing the piece and setting it aside for later use. The remaining piece is the base of the standoff bolt. Take the base (the hollow section) and insert a wall screw into each standoff to prepare for installation.
-
Step 5 - Screw the standoff base into each marked hole
Attach the standoff bolt to the wall by drilling the base into each marked hole. Ensure the bolt is snug to the wall to ensure your print is hung properly and the walls and bolts can support the weight of your artwork.
-
Step 6 - Line up your print with the bolt markers
Hold your print up on the wall and align your acrylic photo with the bolts you secured in step 5. Ask for help to have someone hold your print while you finish the installation.
-
Step 7 - Install the standoff caps
Each standoff should have a washer included with the hardware. Place a washer on each standoff cap and screw each cap into the four bases. Please do not overtighten the caps when installing the standoffs, as this can damage the hardware.
-
Step 8 - Level your Acrylic Print
Once your standoffs are secured, and your print is hung on the wall, use a level to ensure the print is straight and to your liking. Make sure the standoff caps are tightened properly. Once you have confirmed the print is level, the process is complete, and your print is ready to enjoy!